How-to install a Fujitsu© fi-7140 scanner
We have come across some installation issues with Computers that have a 64 Bit application. Below you will find the modified version for the installation of the Scanner.
***NOTE:DO NOT HAVE YOUR SCANNER PLUGGED IN DURING INSTALLATION OF SOFTWARE***
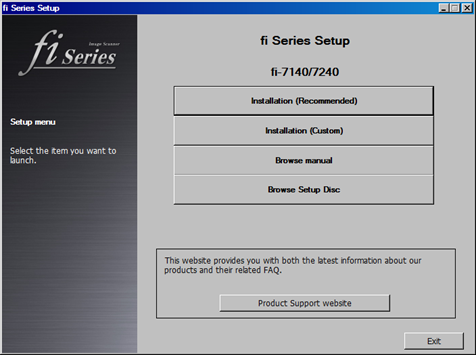
1. Upon placing the installation CD into your disk drive, you will be prompted to run the installation program.
2. From this screen, click “Recommended Installation.”
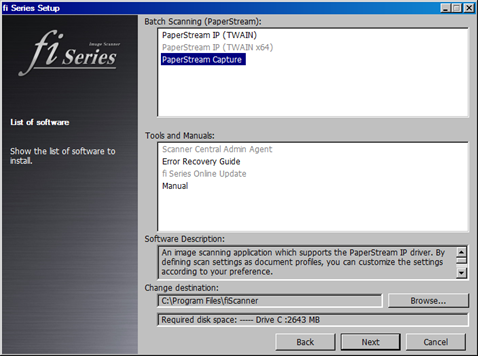
1. Click “Next.”
2.
Select your installation destination,
then click “Next.”
3. Accept the “End-User License Agreement” and click the “Install” button.
4. The recommended programs will now be installed; this process may take several minutes.
5. Once finished, you will be asked if you want to check online for the latest updates. Click “Yes.”
6. Connect the scanner to the PC and turn it on. Click “OK” when this is done.
7. The installer will browse for updates. This may take a few minutes.
8. The update screen will appear with all available updates.
9.
Select them by clicking in the squares
on the left hand side of the box. Select all the available updates.
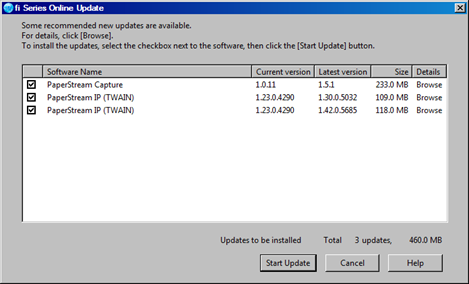
10. Click “Start Update” to proceed. If the “fi Series Online Update” software crashes here, simply restart it.
11. Accept the “End-User License Agreements” for all updates and click the “Next” button.
12. The updates will now install. This may take several minutes.
13.
Once the installation has finished, you
may have to restart your computer.
Please note: If Windows does not recognize the scanner please try another port. We recommend that you don’t move the scanner from the original port once it’s working properly.
Configuring Paperstream
1. Next you will open the PaperStream Capture program, (the Icon should be on your desktop)
2. Upon opening Paperstream, you may be prompted to enter a user license. This is for the premium version that we do not want, so just click the “Use Basic Version” button in the bottom right corner to continue.
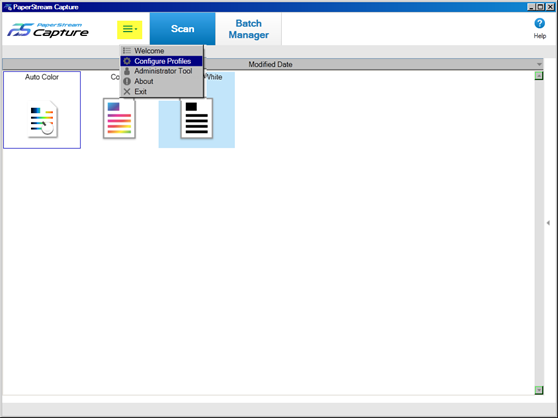
3. Select the “Configure Profiles” option next to the “Scan” Button.
4. Choose any one of the document profiles. We chose “Auto Color”
5. Select “Edit” button to begin setup.
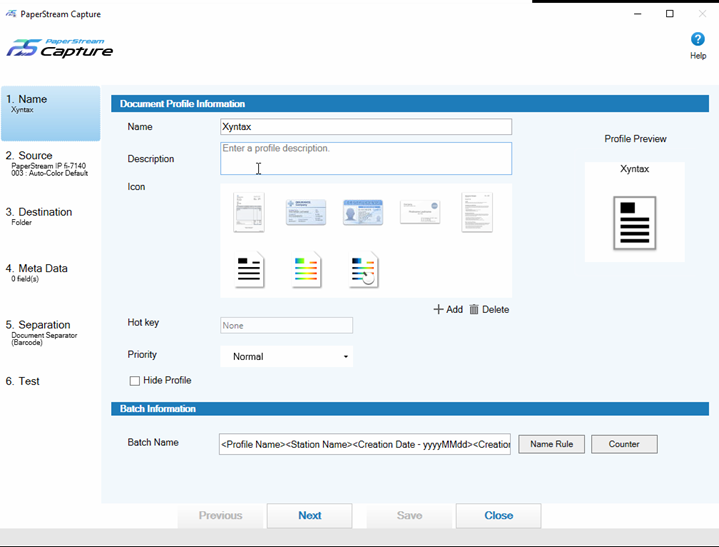
Menu #1 – Name
Choose the name and icon for your scanner
profile, and enter a description if desired.
Click on the Save” button.
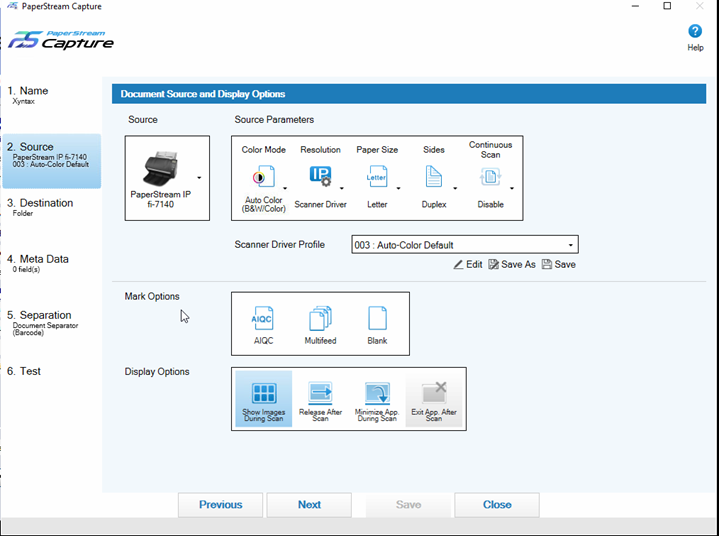
Menu #2 – Source
1. Under “Source” choose ‘Paper Stream IP fi-7140’
2. Under “Source Parameters” select the same options as shown in the picture below.
3. Under “Scanner Driver Profile” choose ‘003: Auto-Color Default’
4. Under “Mark Options” nothing gets highlighted
5. Under “Image Quality” click on “Show Images During Scan”
6. Click on the “Save” button.
7. Click the “Next” button.
Menu #3 – Destination
We chose to have the scans go to my ‘desktop’, as you can see by the name of the ‘Output Folder’. You can create a folder for them on your desktop or in your ‘documents’ etc. The choice is yours.
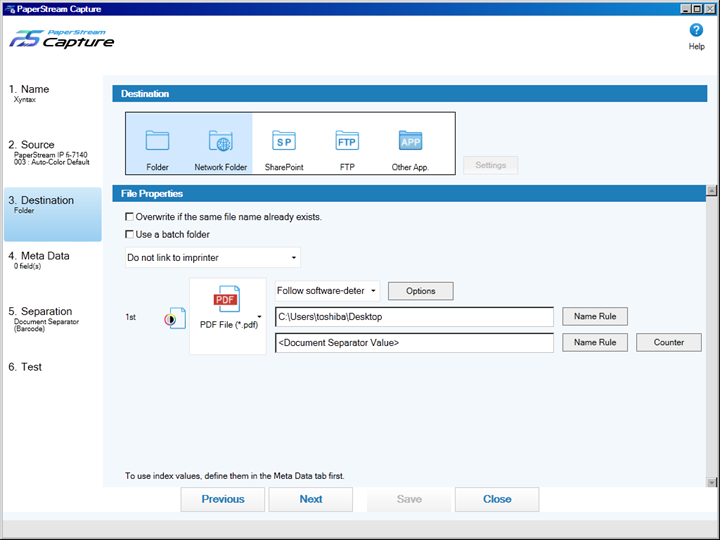
Click on “Save” button.
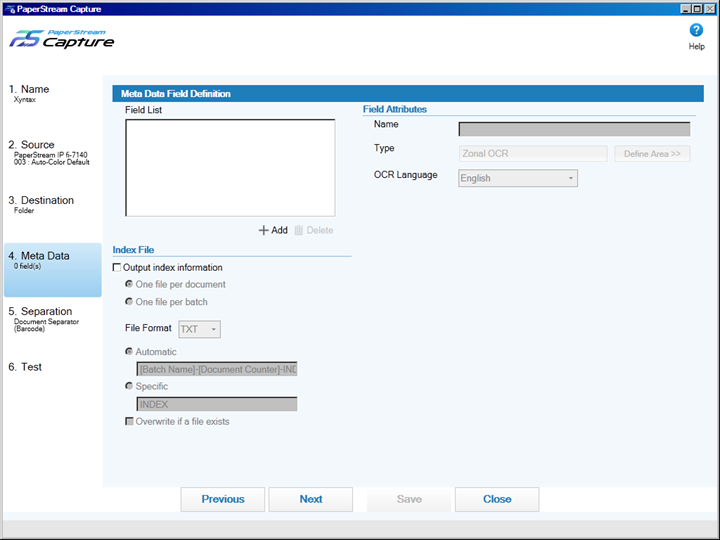
Menu #4 – Meta Data
Nothing should be changed on this screen.
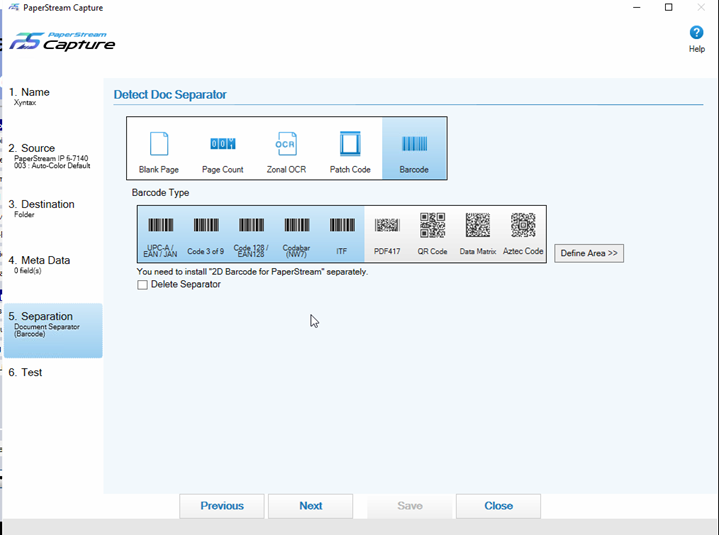
Menu #5 - Separation
Select the options as shown in the picture below.
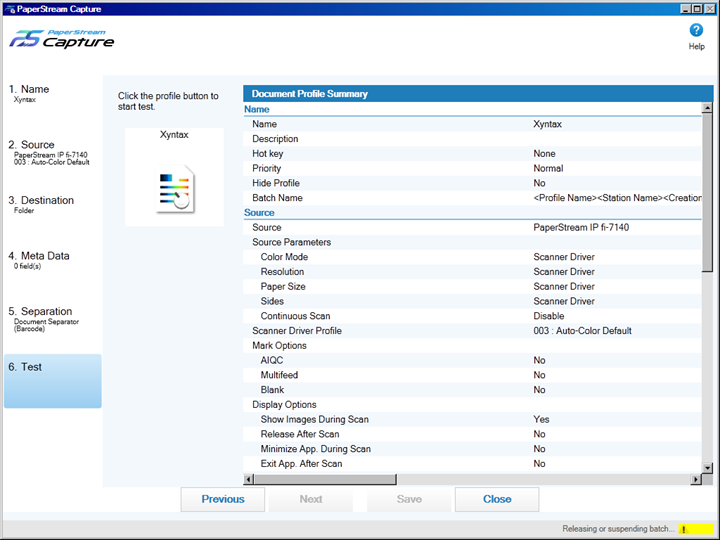
Menu #6 – Test
Select “None” under Index Mode
Put a document with a bar code on it, face down in the scanner and Click the profile button to test your scanner.
A new window will open showing your scanned document. If everything worked ok, click the “Complete Scan” button.
You will be asked if you wish to release the batch. Click yes.
Download the SDK
The SDK is what links Xyntax to the Scanner.
Go to xyntax.net and click on “V11 Client Software.”
Download FiscnSDK.exe to your desktop.
Double click the file to install.
1. Click “Next” on the first screen.
2. Accept the user license agreements and click next.
3. Click “Next” on the table of contents screen.
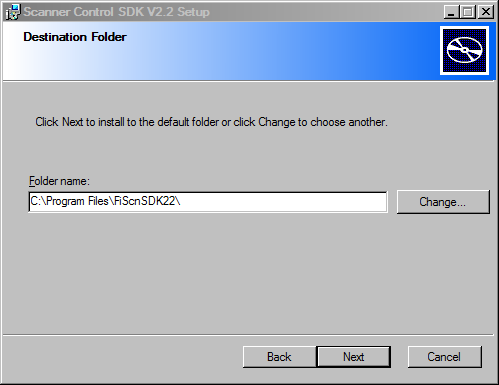
4.
Select the desired installation location
and click next.
5. Click install to finalize installation.
6. Wait for the installation to finish.
7. Click finish.
8.
The Installation will be finalized.
TO SCAN A DOCUMENT TO YOUR DESKTOP
Print barcodes from the Xyntax Utilities drop down box, on the Xyntax main screen.
Open the Paper Stream Capture program.
Click on the “Scan” button along the top of the screen.
Place a document with a barcode sticker on it, face down in the scanner.
Click on the “Auto Color” icon.
Your document will be scanned, and the image will appear on your screen. Ensure the document is “named” by the barcode number as in image #7.
Click on the “Release” button to save the document to your folder.
You can scan multiple documents, with multiple pages, and the documents will be separated by each barcode number.
TO SCAN A DOCUMENT IN DOCULINX
Open DoculinX and click on the “Add Document” button
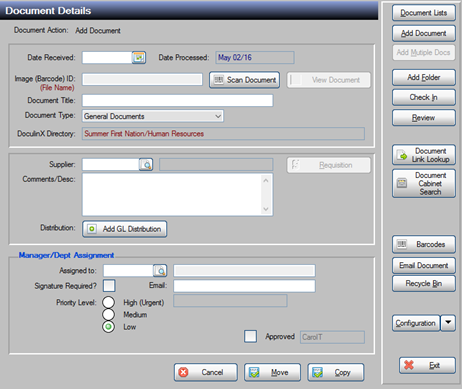
Place a document with a barcode sticker on it, face down in the scanner.
Click on the “Scan Document” button. If you are using the barcodes it will recognize the barcode and it will be used for the file name when saving.
Add a Document title and fill in any other information required for the document.
Click on the Save button to save the document.
If you require any technical support, please don’t hesitate to contact Xyntax support at 866-699-6829 or via email at support@xyntax.com
Customer support service by UserEcho
