How-to install Xyntax (generic)
To install the Xyntax application, you'll need to first download the installation package and the necessary font files. The latest version of Xyntax, including all other supporting files, can be found here.
You'll need to download the following:
- Xyntax Generic Installation Package (ver. pxp1410-0000-WPI.exe)
- Cheque MICR Font (micrenc.ttf)
- System Font 1 (VeraMoBd.tff)
- System Font 2 (VeraMono.ttf)
| Important! -- The application must be installed, with administrator rights, in order to make it compatible with all Windows Vista SP2 or newer. |
Once the downloads have completed (it may take a few minutes)...
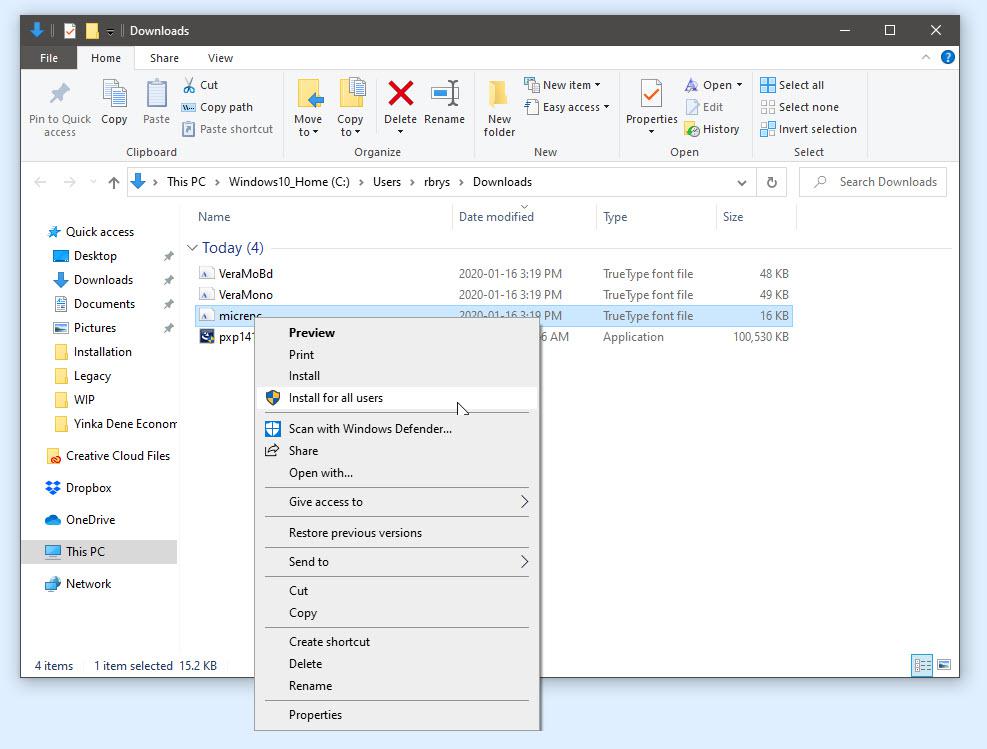
1. Right-click on each of the three font files and click Install for all users.
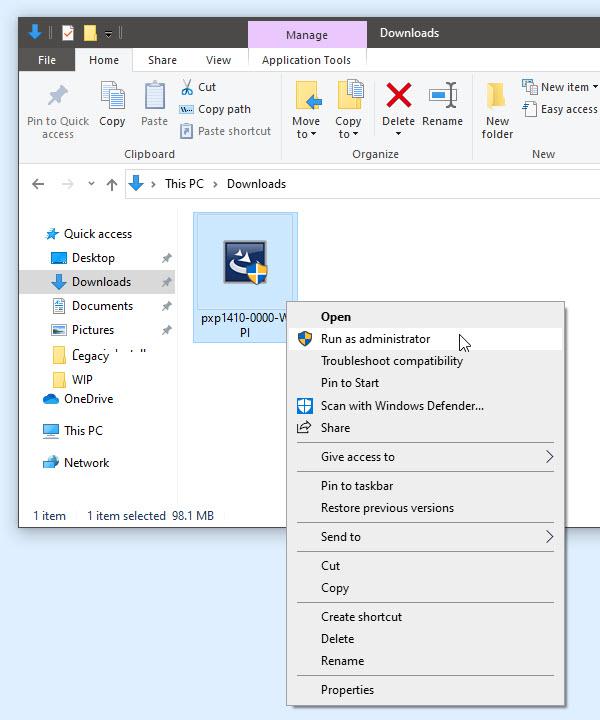
2. Right-click on pxp####-####-WPI.exe and click Run as administrator.
Installing all files with administrative rights will ensure that the necessary font files and the Xyntax application itself can operate properly. Failing to do so will prevent the program from running properly. If you do not have administrative rights to your computer, please contact your technician.
If you do, an installation wizard will appear that will guide you through the installation of the Xyntax application:
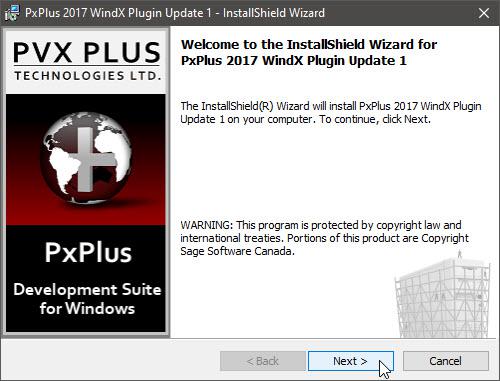
3. Click Next.
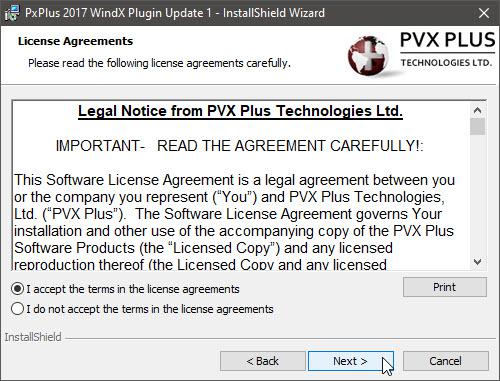
4. Read the License Agreement carefully—you must agree to the terms of this License Agreement to install and use Xyntax. If you've read and understood the License Agreement, click I Agree and click Next.
5. Click Next.
6. Click Next.
7. Choose the Destination folder for where to install Xyntax. To choose an alternate install location, click Change.
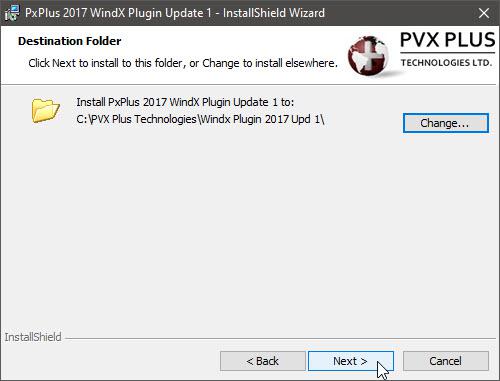
8. Click Next and choose to install for "Anyone who uses this computer (all users)"
Wait for the installation process to complete.
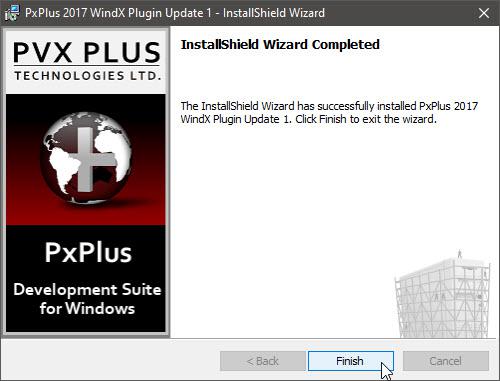
9. Click Finish.
Now that the program has been installed, it’ll be time to create and configure the local shortcut (and remote shortcut if you want) to access the Xyntax server.
10. In the bottom left, click the Windows icon. Navigate to the WindX Plugin folder.
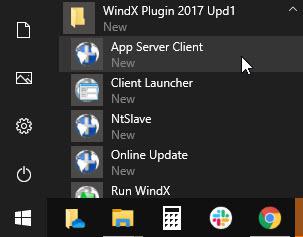
11. Create a shortcut by clicking and dragging the App Server Client to the desktop.
12. Double-click on the App Server Client icon.
If the following error message appears:
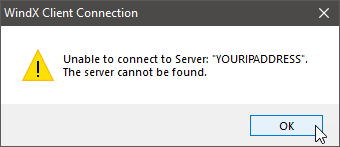
Don't worry, the next step is to configure the shortcut to point towards your Xyntax server.
NEXT: How-to create a local shortcut.
Related Articles
How-to create a local shortcut (generic)
Customer support service by UserEcho
